
使用nni尋找最佳超參數
前言
在實驗室第9次新生訓練時,學長介紹了nni,並且讓我們回家練習使用nni。作業是透過cnn網路與CIFAR10的dataset,搭配nni來找尋最佳超參數。
作業檔案簡介
Github: https://github.com/ThreeMonth03/hyperparameter_tuning
config資料夾放了requirement.txt。
src資料夾放了source
code,裡面包含cnn.py,模型的訓練檔,和nni_search.py,裡面包含api用來控制超參數。
log資料夾下,放了nni的experiment log,可以觀看歷史training紀錄。
如何從頭復現nni training
git clone https://github.com/ThreeMonth03/hyperparameter_tuning.gitdocker-compose up,記得port和container/image name要做更改,這裡值得注意,別用docker-compose up -d,不然experiment log肯定不會存下來。- 瀏覽器中打開
localhost:[your_port]查看nni的結果。
如何直接看我的training log
git clone https://github.com/ThreeMonth03/hyperparameter_tuning.git- 按照nni_search.py內的指示做適當的註解和解除註解,意思大概就是把training的設定註解,觀看experiment
log的部分解除註解,也就是解除註解
experiment.view(experiment_id, port=8323, non_blocking=False)這行。 docker-compose up,記得port和container/image name要做更改。- 瀏覽器中打開
localhost:[your_port]查看nni的結果。
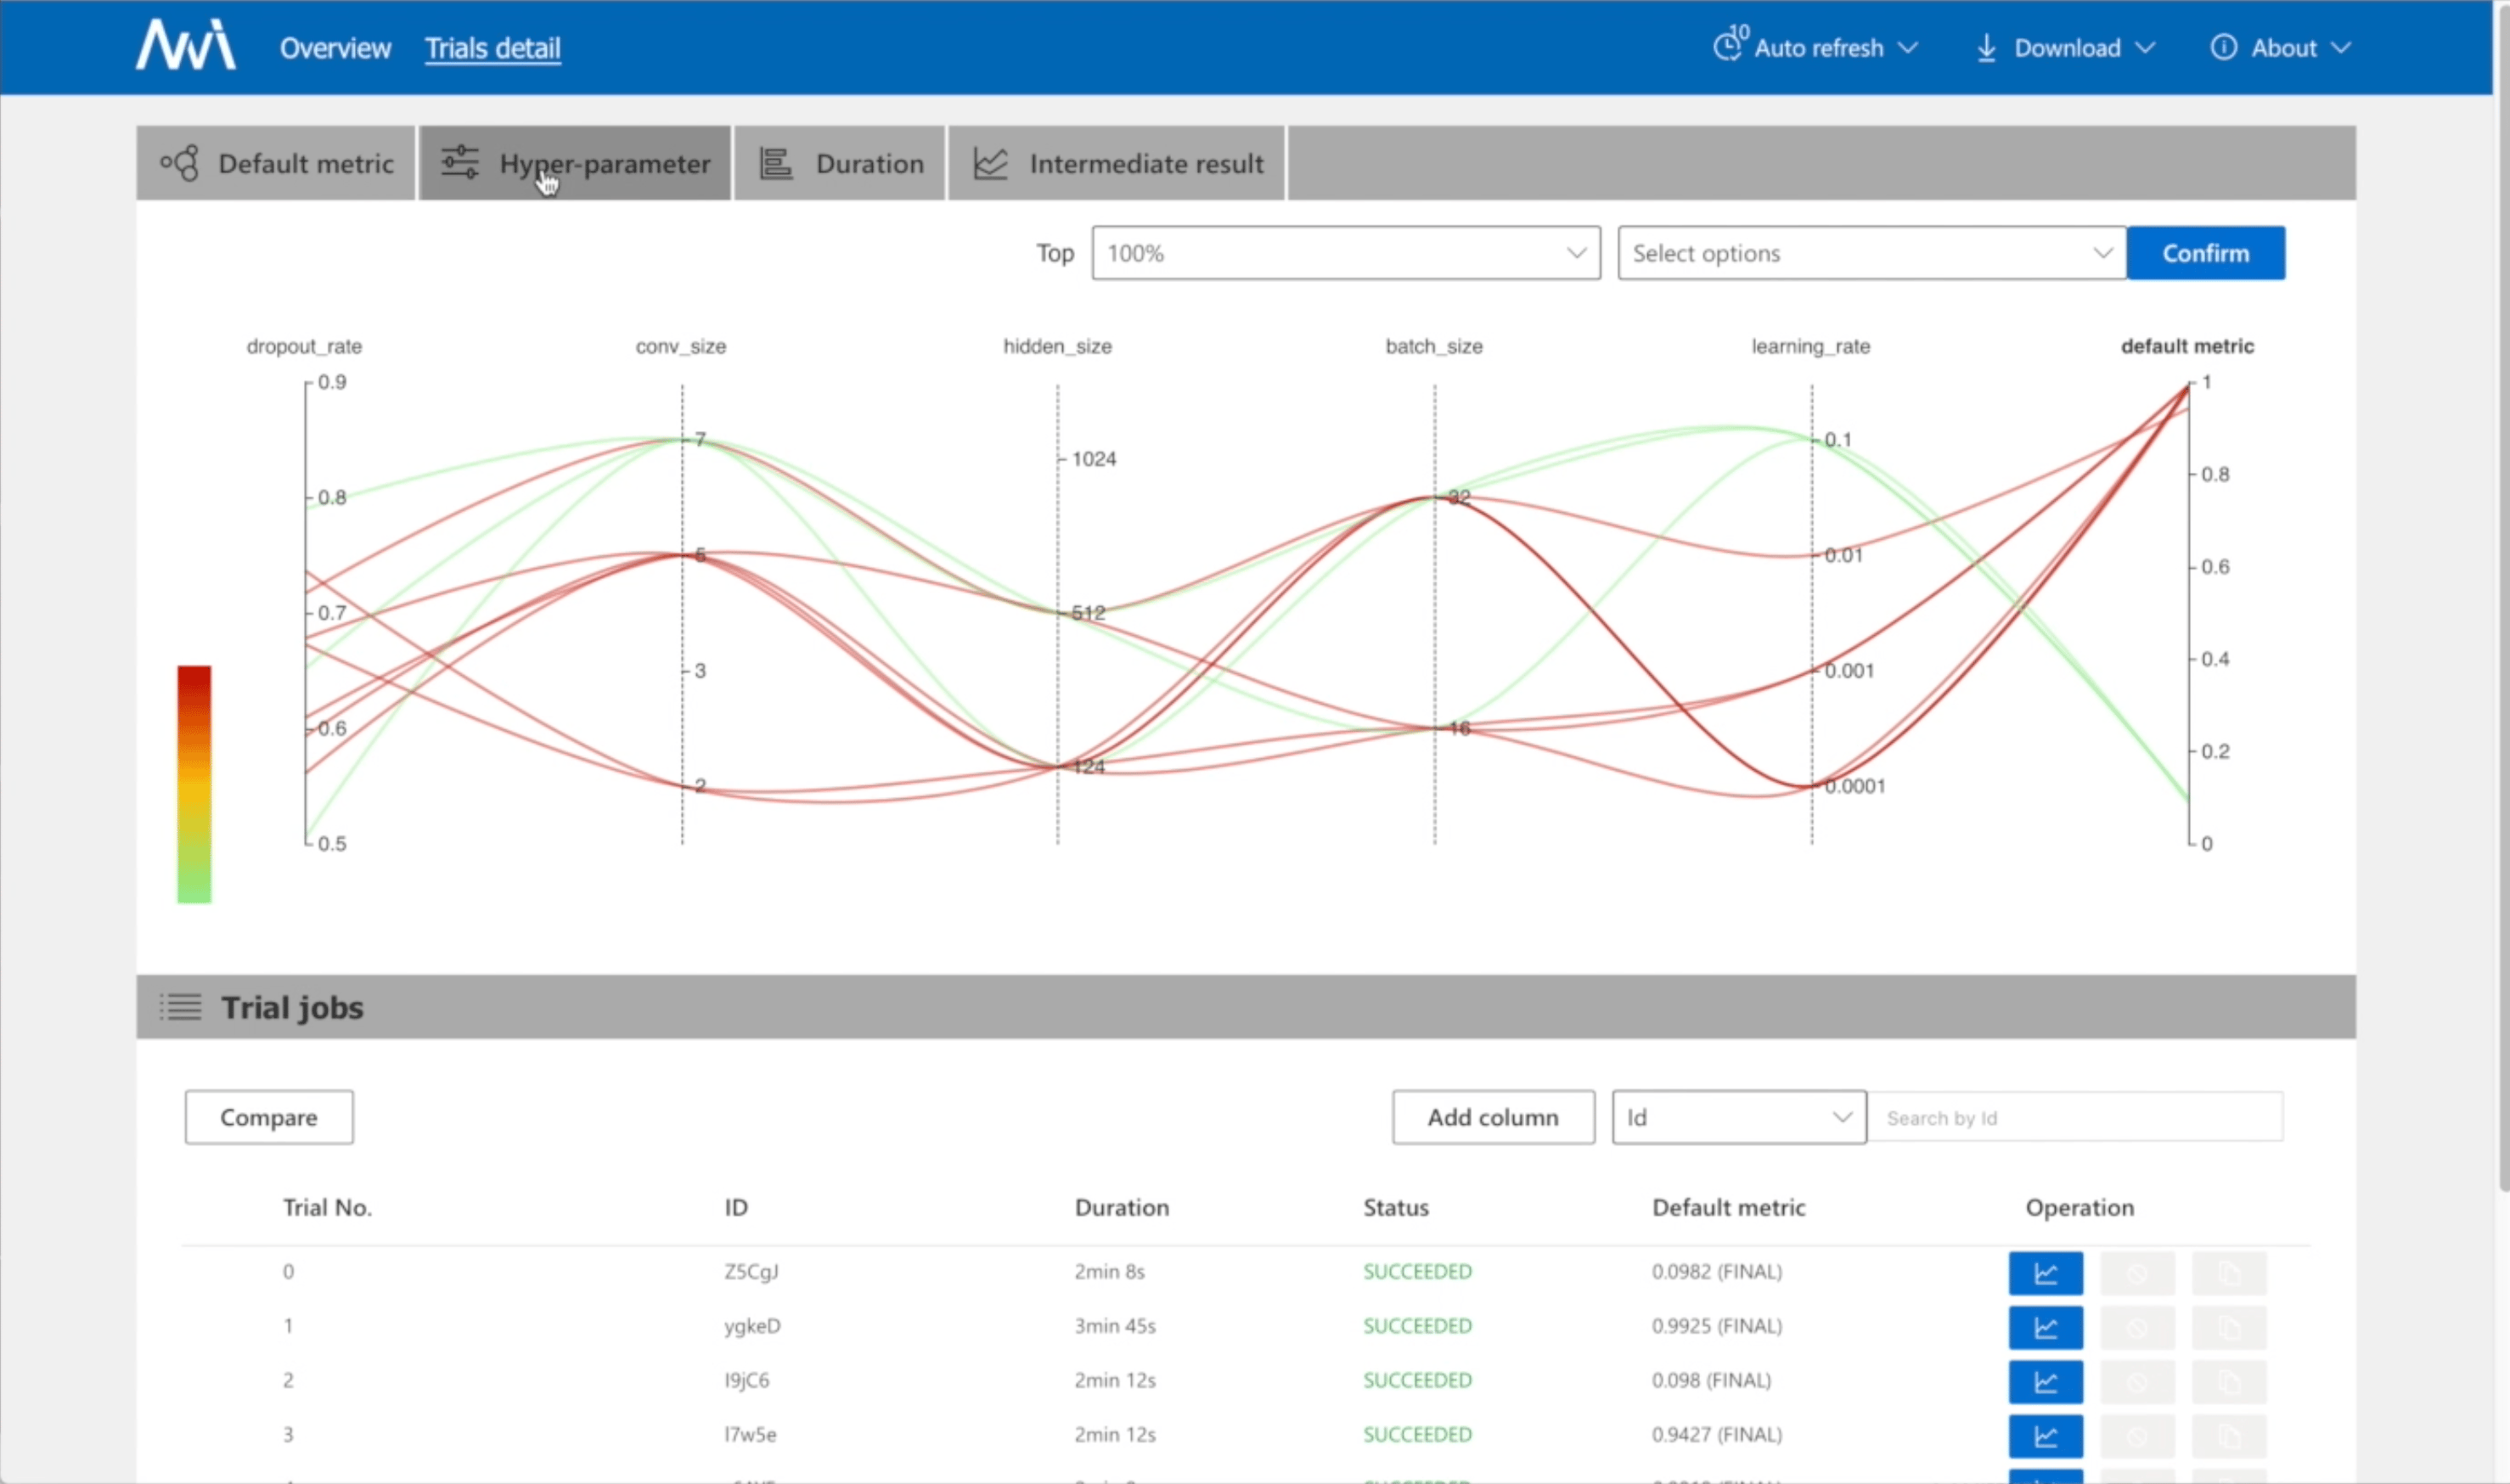
Experiment Detail
Search Space and Tuner
- lr : 0.0001~0.1 , log uniform
- momentum : 0~1 , uniform
- batch size : 4 , 8 , 16
- Tuner : TPE
Result
- Best hyperparameter
- lr : 0.0024724673142795927
- momentum : 0.31344560117709097
- batch_size : 8
- Test Accuracy: 65%
- ScreenShot


筆記
如何用python api調hyperparameter
nni可以透過termial的指令輸入來控制hyperparameter,也可以透過python
api來控制hyperparameter,以下是透過api控制的code。
1
2
3
4
5
6
7
8
9
10
11
12
13
14
15
16
17
18
19
20
21
22
23
24
25
26
27
28
#nni_search.py
search_space = {
'lr': {'_type': 'loguniform', '_value': [0.0001, 0.1]},
'momentum': {'_type': 'uniform', '_value': [0, 1]},
'batch_size': {"_type": "choice", "_value": [4, 8, 16]},
}#Modify search_space
import nni
from nni.experiment import Experiment
experiment = Experiment('local')#local training
experiment.config.trial_command = 'python src/cnn.py'# target model
experiment.config.trial_code_directory = '.' #model directory
experiment.config.search_space = search_space# search space
experiment.config.tuner.name = 'TPE'
experiment.config.tuner.class_args['optimize_mode'] = 'maximize'
experiment.config.max_trial_number = 50
experiment.config.trial_concurrency = 10
experiment.config.trial_gpu_number = 3# 3 GPU device
experiment.config.debug = True
experiment.config.experiment_working_directory = './log' # The position where the log store
experiment.config.training_service.use_active_gpu = True
experiment.config.training_service.max_trial_number_per_gpu = 10
experiment.run(8323)#port
print(experiment.get_status())
print(experiment.get_job_statistics())
print(experiment.list_trial_jobs())
input('Press enter to quit')#Without this line, you could not watch the GUI interface after process exiting.
experiment.stop()
至於被控制的model,也要另外加一些行數來控制參數。
1 | |
後記
其實很久以前就知道有自動找參數的api了,只是一直沒有嘗試過。經過這次學長給的nni練習,讓我快速上手調參的方法,以後再也不用手動調參了。